Securing an internet-facing Linux server or Linux VPS starts with controlling network access and preventing automated brute-force attacks. ConfigServer Security & Firewall (CSF) is a powerful, free, stateful packet inspection (SPI) firewall application designed for Linux distributions (Ubuntu, Debian, AlmaLinux, Rocky Linux, CentOS, and cPanel / DirectAdmin web hosting servers).
CSF combines advanced iptables / nftables firewall rule management with Login Failure Daemon (LFD)—an automated security process that monitors system authentication logs (SSH, FTP, cPanel, email daemons) and automatically bans attacking IP addresses in real time.
Why choose CSF Firewall for Linux VPS and hosting servers?
- Automated Brute-Force Protection (LFD): Automatically detects repeated failed SSH, cPanel, Dovecot, Postfix, and FTP login attempts and blocks offenders.
- Port Scan Protection: Detects and drops aggressive port-scanning bots across the entire TCP/UDP port range.
- SYN Flood & Connection Limiting: Protects against small-to-medium DDoS and connection exhaustion attacks.
- cPanel & DirectAdmin Integration: Provides a native graphical interface inside web hosting control panels.
- Country / Geo-IP Blocking: Easily allow or deny traffic from specific ISO country codes.
Step 1: Install prerequisites and dependencies
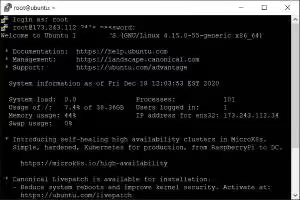
Log in to your Linux server via SSH as root and install required Perl modules and network utilities:
On RHEL / AlmaLinux / Rocky Linux:
sudo dnf install perl perl-libwww-perl perl-LWP-Protocol-https perl-GDGraph wget tar iptables ipset -yOn Ubuntu and Debian:
sudo apt update && sudo apt install perl libwww-perl liblwp-protocol-https-perl libgd-graph-perl wget tar iptables ipset -yStep 2: Download and install CSF Firewall
Download the latest official package directly from ConfigServer and execute the automated installer script:
cd /usr/src
sudo wget https://download.configserver.com/csf.tgz
sudo tar -xzf csf.tgz
cd csf
sudo sh install.sh
Verify that your Linux kernel supports all necessary iptables modules:
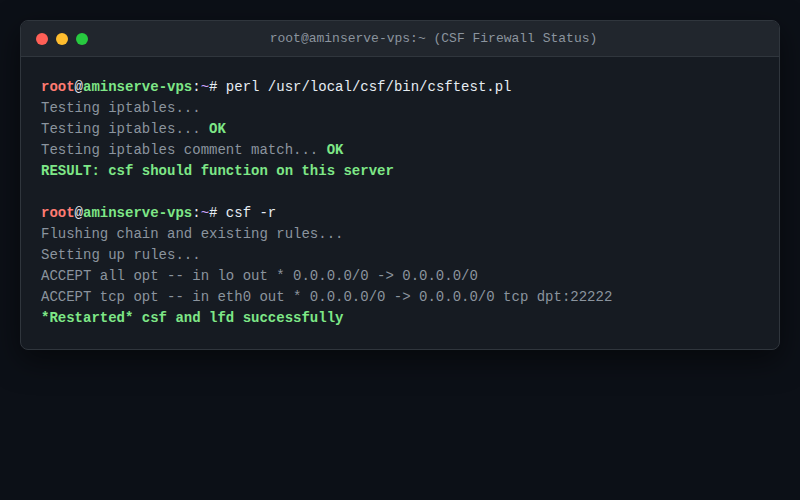
sudo perl /usr/local/csf/bin/csftest.plIf the test outputs “RESULT: csf should function on this server”, your system is fully ready.
Step 3: Configure ports and disable testing mode
- Open the primary CSF configuration file in a text editor:
sudo nano /etc/csf/csf.conf - Disable Testing Mode (Crucial):
By default, CSF installs in testing mode (
TESTING = "1"), which clears all rules every 5 minutes to prevent lockouts. Once you have verified your ports, change it to:TESTING = "0" - Specify Allowed Inbound and Outbound Ports:
Locate the
TCP_INandTCP_OUTdirectives. Ensure your custom SSH port, web ports, and mail ports are listed:# Example: Allow standard Web (80, 443) and custom SSH port (e.g. 22222) TCP_IN = "20,21,53,80,110,143,443,465,587,993,995,22222" TCP_OUT = "20,21,53,80,110,113,443,587,993,995,22222" UDP_IN = "20,21,53" UDP_OUT = "20,21,53,113,123" - Save the file (Ctrl + O, Enter) and exit (Ctrl + X).
Step 4: Start and enable CSF and LFD services
Start the firewall and daemon services using systemd:
# Restart and reload all firewall rules
sudo csf -r

# Enable and start services on system boot
sudo systemctl enable csf lfd
sudo systemctl start csf lfd

# Verify service status
sudo systemctl status csf lfd
Essential CSF CLI commands for administrators
- Whitelist an IP Address (Never block):
sudo csf -a 198.51.100.25 "Office Static IP" - Block an IP Address manually:
sudo csf -d 198.51.100.50 "Malicious Bot" - Unban / Remove an IP from blocklist:
sudo csf -dr 198.51.100.50 - Search for an IP in active firewall rules:
sudo csf -g 198.51.100.50 - Temporarily disable firewall (Flush rules):
sudo csf -f
Emergency rescue via VNC Console
If an accidental configuration error blocks your IP address, log in to your Aminserve Client Area, open your active service, and launch the out-of-band HTML5 VNC console as explained in our VNC rescue guide to run csf -f or whitelist your IP.
For secure, high-bandwidth cloud infrastructure with full root access, explore Aminserve Linux and Windows VPS hosting and Dedicated RDP Plans with 24/7 dedicated support.