By default, Remote Desktop Protocol (RDP) listens on TCP port 3389 on all Windows operating systems. Because port 3389 is globally known, malicious automated bots constantly scan the public internet attempting brute-force password attacks against exposed servers.
Changing your RDP listening port to a custom, non-standard number (e.g. 33389 or 49152–65535) eliminates more than 99% of automated port-scanning noise, keeps your security event logs clean, and protects your Windows VPS or dedicated server from constant connection attempts.
Why you should change the default RDP port
- Eliminates Automated Brute-Force Scans: Bots scanning public IPv4 subnets target port 3389 exclusively and will skip your server entirely.
- Reduces CPU & RAM Overhead: Continuous failed login attempts exhaust server CPU and bloat Windows Security Event Logs.
- Reduces Account Lockout Risk: Prevents attackers from triggering Windows Account Lockout thresholds on legitimate Administrator accounts.
- Defense in Depth: Combined with strong passwords and Network Level Authentication (NLA), port obfuscation adds an effective layer of perimeter defense.
Important safety rules before changing your port
- Never pick common service ports: Avoid ports like
21(FTP),22(SSH),25(SMTP),80(HTTP),443(HTTPS), or8080. - Use the dynamic port range: Choose a port between 10000 and 65535 (e.g.
33389,45890,52100). - Always open the new firewall port FIRST: If you change the registry port before opening the Windows Firewall rule, you will lock yourself out of Remote Desktop.
Method 1: Change RDP port using PowerShell (Fastest & Safest)
You can update the registry, create the new Windows Firewall rule, and restart the Remote Desktop service safely in one single PowerShell script:
- Connect to your server via Remote Desktop as an Administrator.
- Right-click the Start button and open Windows PowerShell (Admin).
- Define your desired port number (e.g.
33389) and run the following automated block:$port = 33389 # 1. Update RDP Port in Windows Registry Set-ItemProperty -Path 'HKLM:\SYSTEM\CurrentControlSet\Control\Terminal Server\WinStations\RDP-Tcp' -Name "PortNumber" -Value $port # 2. Add New Inbound Windows Firewall Rule New-NetFirewallRule -DisplayName "Custom RDP Port $port" -Direction Inbound -Protocol TCP -LocalPort $port -Action Allow # 3. Restart Remote Desktop Service (TermService) Restart-Service -Name "TermService" -Force
Your session will temporarily disconnect as the service restarts. You can immediately reconnect using your new custom port.
Method 2: Change RDP port manually via Registry Editor
Step 1: Create the inbound firewall rule FIRST
- Press Win + R, type
wf.msc, and hit Enter. - Click Inbound Rules > New Rule….
- Select Port > TCP > Specific local ports:
33389(or your custom port). - Select Allow the connection > Check all profiles (Domain, Private, Public) > Name the rule Custom RDP Port > Click Finish.
Step 2: Edit the RDP PortNumber in regedit
- Press Win + R, type
regedit, and hit Enter. - Navigate to the following key:
HKEY_LOCAL_MACHINE\SYSTEM\CurrentControlSet\Control\Terminal Server\WinStations\RDP-Tcp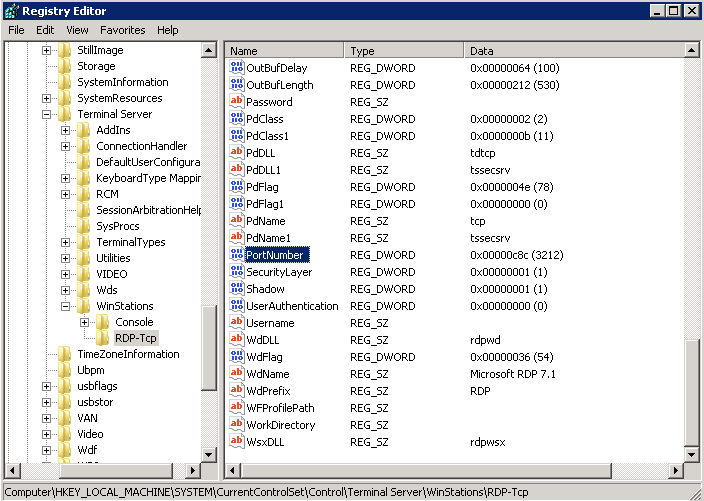
- In the right pane, double-click on PortNumber:
- Select the Decimal base radio button.
- Enter your new port number (e.g.
33389). - Click OK.
- Restart your server from the Start menu to apply changes.
How to connect to your server using a custom port
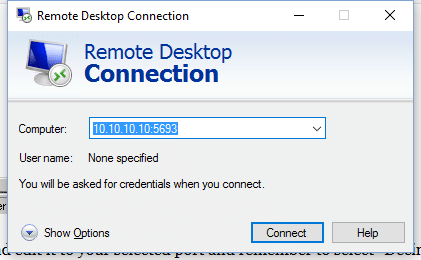
When connecting from your local computer, you must now append a colon and the custom port number to your server IP address:
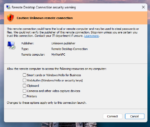
- Open Remote Desktop Connection (
mstsc.exe) on your PC or Mac. - In the Computer field, enter:
YOUR_SERVER_IP:CUSTOM_PORT(e.g.198.51.100.25:33389). - Click Connect and enter your Windows credentials.
Emergency troubleshooting: What to do if locked out?
If you made a typo or forgot to open the firewall before rebooting:
- VNC Console Rescue: Log in to your Aminserve Client Area, open your active service, and launch the out-of-band HTML5 VNC console as explained in our VNC rescue guide to fix the firewall or registry directly.