
The Domain Name System (DNS) acts as the internet’s phonebook, translating human-friendly domain names (like aminserve.com) into numerical IP addresses (like 104.21.58.12) that computers use to route network traffic. Changing your default DNS resolver on a Windows VPS, Windows RDP, or local Windows 10/11 PC can dramatically improve browsing speeds, reduce latency, bypass ISP routing bottlenecks, and enhance DNS query privacy.
This guide explains how to change your DNS settings in Windows using the graphical network adapter panel (ncpa.cpl), modern Windows Settings, and 1-line PowerShell / Command Prompt automation—along with how to properly flush your local DNS cache.
Recommended fast and secure public DNS resolvers
By default, Windows connects to DNS servers provided by your local ISP or datacenter. Switching to dedicated high-speed global Anycast resolvers provides faster resolution times and built-in malware filtering:
- Cloudflare DNS (Fastest & Privacy-Focused):
- Preferred IPv4:
1.1.1.1 - Alternate IPv4:
1.0.0.1
- Preferred IPv4:
- Google Public DNS (High Reliability & Global Routing):
- Preferred IPv4:
8.8.8.8 - Alternate IPv4:
8.8.4.4
- Preferred IPv4:
- Quad9 DNS (Built-in Malicious Domain Blocking):
- Preferred IPv4:
9.9.9.9 - Alternate IPv4:
149.112.112.112
- Preferred IPv4:
Method 1: Change DNS via Network Connections Control Panel (ncpa.cpl)
This method is identical and reliable across all Windows versions (Windows Server 2016–2025, Windows 10, and Windows 11):
- Press Win + R on your keyboard to open the Run dialog.
- Type
ncpa.cpland press Enter to open Network Connections. - Right-click your active network adapter (e.g. Ethernet or Wi-Fi) and select Properties.
- Scroll through the item list, select Internet Protocol Version 4 (TCP/IPv4), and click Properties.
- Crucial: Keep “Obtain an IP address automatically” (or your existing static IP values) untouched! Do NOT change the IP address section.
- Select “Use the following DNS server addresses” and enter:
- Preferred DNS server:
1.1.1.1 - Alternate DNS server:
8.8.8.8
- Preferred DNS server:
- Click OK and then Close to apply the changes immediately.
Method 2: Change DNS via PowerShell (One-Line Command)
For system administrators managing remote servers via command line:
- Open PowerShell with Administrator privileges.
- List the active network interface names:
Get-NetAdapter | Select-Object Name, Status, InterfaceDescription - Set the new DNS resolver addresses (e.g. Cloudflare + Google):
Set-DnsClientServerAddress -InterfaceAlias "Ethernet" -ServerAddresses ("1.1.1.1", "8.8.8.8") - Verify the applied DNS servers:
Get-DnsClientServerAddress -InterfaceAlias "Ethernet" -AddressFamily IPv4
How to flush DNS cache in Windows
After changing DNS servers, Windows may retain outdated domain records in its local cache. Clear the local cache to force queries through your new resolvers immediately:
- Open Command Prompt or PowerShell.
- Run the flush command:
ipconfig /flushdns - You will receive the confirmation message: “Successfully flushed the DNS Resolver Cache.”
How to test and verify DNS resolution speed
Test that your new DNS servers are resolving hostnames correctly using nslookup:
nslookup aminserve.com 1.1.1.1The output confirms the responding DNS server address and the resolved IP records.
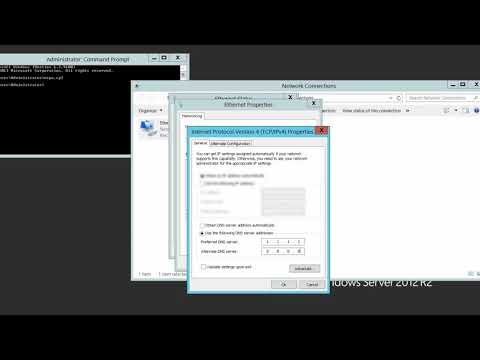
Video tutorial
For high-performance, developer-ready virtual cloud infrastructure with optimized low-latency network routing, explore Aminserve Windows VPS and High-Speed RDP Servers with 24/7 dedicated support.