Applies to: All Windows OS
When managing a Windows VPS or RDP server, you’ll often need to create additional user accounts — for example, to share access with a team member without handing over your administrator credentials, or to set up isolated environments for different users. This guide walks you through both a quick automated method and a manual step-by-step approach using the command line.
Prerequisites
- Administrator access to the Windows machine (enabled by default on all AMinServe services)
- Remote Desktop enabled on the target machine
- A strong, unique password ready for the new user
ℹ️ Why create a separate user? It is best practice to avoid sharing your administrator account. A dedicated user account limits what a person can access, reduces risk if credentials are compromised, and lets you revoke access for one user without affecting others.
Fast Solution (Automated Script)
⚡ One-click option
Download this script and run it inside your RDP session. It automates the steps below — creating a new user account and adding it to the Remote Desktop Users group. You will be prompted to enter a username and password. No manual commands needed.
✅ If you prefer to understand exactly what is happening, or if you want more control over the process, follow the manual steps below.
Manual Solution (Command Line)
The manual method uses two net commands in Command Prompt to create the user and grant them RDP access. This works on all supported Windows versions.
1– Open Command Prompt as Administrator
Click the Start menu and type cmd. Right-click Command Prompt in the results and choose Run as administrator. You must run CMD as an administrator — otherwise the commands will fail with an “Access is denied” error. 
2– Create the New User Account
Type the following command and press Enter, replacing USERNAME and PASSWORD with your chosen values:
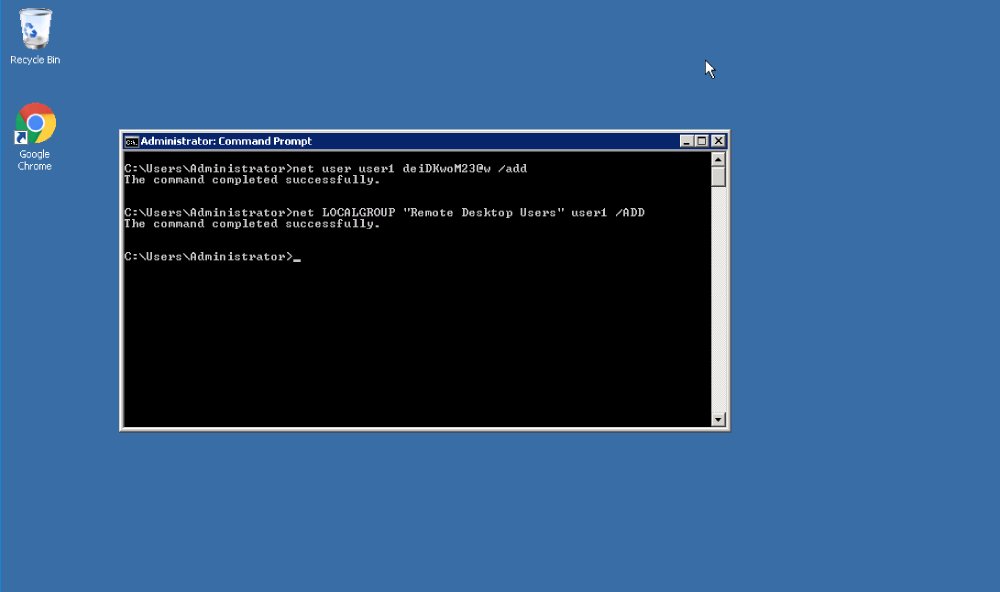
net user USERNAME PASSWORD /add

Example:
net user john Xk9#mPqL72! /add
A successful result shows: The command completed successfully.
⚠️ Use a strong password. RDP accounts exposed to the internet are a common brute-force target. Use at least 12 characters, mixing uppercase, lowercase, numbers, and symbols. Never use a placeholder like
password1on a live server.
3– Grant the User Remote Desktop Access
Adding a user does not automatically allow them to connect via RDP. Run this second command to add them to the Remote Desktop Users group:
net localgroup "Remote Desktop Users" USERNAME /add

Example:
net localgroup "Remote Desktop Users" john /add
Both commands together — what they do:
| Command | What it does |
|---|---|
net user ... /add | Creates a local Windows user account with the specified credentials |
net localgroup "Remote Desktop Users" ... /add | Adds the user to the group that is permitted to start RDP sessions |
Step 4: Verify the New User Can Connect
Open a new Remote Desktop Connection session (do not close your current one) and test the new credentials:
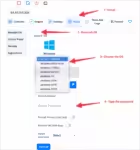
- Press Win + R, type
mstsc, and press Enter - Enter the server’s IP address and click Connect
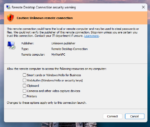
- When prompted for credentials, click More choices → Use a different account
- Enter the new username and password you just created
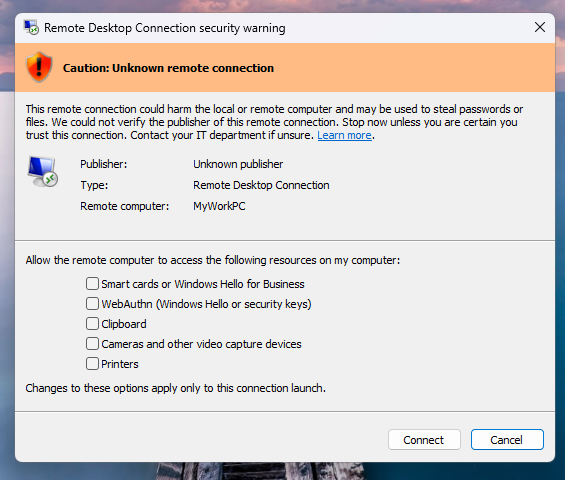
- Accept any certificate warnings and confirm you can log in successfully
✅ Keep your administrator session open while testing, so you can fix any issues without getting locked out.
Security Best Practices
Once the new account is working, consider these steps to harden your setup:
- Use the least privilege principle. The new user is a standard (non-administrator) account by default — keep it that way unless they specifically need admin rights.
- Set a password expiry policy. For long-running servers, configure passwords to expire periodically via
net accounts /maxpwage:90. - Disable accounts you no longer need. Use
net user USERNAME /active:noto disable an account without deleting it, preserving its files and settings. - Enable Network Level Authentication (NLA). NLA requires users to authenticate before a full RDP session is established, reducing exposure to unauthenticated attacks.
- Consider changing the default RDP port (3389) to a non-standard port to reduce automated scanning attempts.
Troubleshooting
| Problem | Likely cause | Fix |
|---|---|---|
| “Access is denied” when running commands | CMD not running as administrator | Right-click CMD → Run as administrator |
| User created but cannot connect via RDP | Forgot to run the localgroup command | Run net localgroup "Remote Desktop Users" USERNAME /add |
| “The remote computer requires Network Level Authentication” | RDP client version mismatch or NLA settings | Update your RDP client, or disable NLA temporarily in System Properties → Remote tab |
| Connection refused / timeout | Firewall blocking port 3389, or RDP not enabled | Confirm RDP is enabled in System Properties and that port 3389 is open in Windows Firewall |
| “The system error 1378 has occurred” (already in group) | User is already a member of Remote Desktop Users | No action needed — the user already has RDP access |
🚫 To remove a user and revoke access: Run
net user USERNAME /delete. This permanently deletes the account and all associated local data. Use/active:noinstead if you may need to restore the account later.