While Linux servers and Linux VPS instances are primarily administered via command-line SSH, certain tasks—such as running web browsers (Chromium/Firefox), GUI developer tools, automated bot managers, and legacy desktop applications—require a graphical user interface (GUI). Virtual Network Computing (VNC) allows you to access a complete, interactive Linux desktop from any PC, Mac, or mobile device across the internet.
This comprehensive guide explains how to install a lightweight desktop environment (XFCE4), configure TigerVNC Server, automate startup scripts, and securely connect over an encrypted SSH tunnel on Ubuntu, Debian, AlmaLinux, Rocky Linux, and CentOS.
Why choose XFCE4 over GNOME for VPS servers?
Default GNOME and KDE desktop environments consume between 1.5 GB and 2.5 GB of RAM at idle. For virtual cloud instances, XFCE4 is the industry standard recommendation because:
- Ultra-Lightweight: Consumes only ~300 MB of RAM, leaving maximum system memory available for applications.
- High Performance: Optimized for low CPU overhead and fast rendering across remote network connections.
- Stable: Highly compatible with all VNC servers without compositor freezing.
Step 1: Install XFCE Desktop and TigerVNC Server
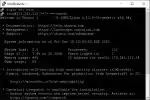
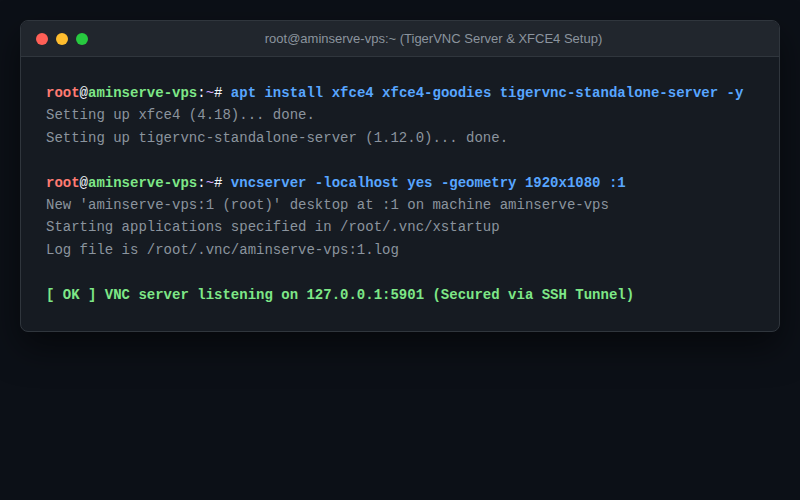
Connect to your Linux server via SSH as root or a sudo user and install the required packages:
On Ubuntu and Debian:
sudo apt update && sudo apt install xfce4 xfce4-goodies tigervnc-standalone-server dbus-x11 -yOn AlmaLinux, Rocky Linux, and CentOS:
sudo dnf groupinstall "Xfce" -y
sudo dnf install tigervnc-server -y
Step 2: Set up VNC access password
Run the initial password setup utility to generate the encrypted credentials and configuration directory:
vncpasswd- Enter your chosen password (must be between 6 and 8 characters).
- Verify the password.
- When asked: “Would you like to enter a view-only password (y/n)?”, type
nand press Enter.
Step 3: Configure the VNC startup script (xstartup)
The xstartup file dictates which desktop environment launches when VNC starts.
- Create and open the startup script in a text editor:
nano ~/.vnc/xstartup - Paste the following configuration:
#!/bin/bash unset SESSION_MANAGER unset DBUS_SESSION_BUS_ADDRESS export XKL_XMODMAP_DISABLE=1 [ -x /etc/vnc/xstartup ] && exec /etc/vnc/xstartup [ -r $HOME/.Xresources ] && xrdb $HOME/.Xresources # Launch XFCE4 Desktop startxfce4 & - Save the file (Ctrl + O, Enter) and exit (Ctrl + X).
- Grant execute permissions to the script:
chmod +x ~/.vnc/xstartup
Step 4: Start the VNC server instance
Launch the VNC display server. To ensure complete security against public internet sniffing, bind VNC to localhost so connections must route through an encrypted SSH tunnel:
vncserver -localhost yes -geometry 1920x1080 -depth 24 :1Flags:
:1: Creates display:1(listens internally on port5901).-localhost yes: Prevents exposing raw unencrypted VNC ports to the public internet.-geometry 1920x1080: Sets default screen resolution.-depth 24: 24-bit true color rendering.
Step 5: Connect securely via SSH Tunnel (Recommended)
Because native VNC traffic is unencrypted, always route connections through an SSH tunnel.
From Windows (Using CMD or PowerShell) / macOS / Linux:
- Open a terminal on your local computer and establish an SSH port-forwarding tunnel:
ssh -L 5901:127.0.0.1:5901 -N -f -l root YOUR_SERVER_IP -p 22(If you use a custom SSH port, replace
-p 22with your custom port). - Download and open a free VNC client on your local computer (e.g. TigerVNC Viewer or RealVNC Viewer).
- In the VNC Server address field, enter:
127.0.0.1:5901 - Click Connect, enter your VNC password, and your XFCE4 Linux desktop will open in high resolution.
How to kill or restart the VNC session
# Kill active display :1
vncserver -kill :1

# Start display :1 again
vncserver -localhost yes -geometry 1920x1080 :1
Emergency access: Out-of-band VNC Console
If your operating system network configuration fails or firewall rules block SSH tunnels, log in to your Aminserve Client Area to access the hardware-level HTML5 VNC console as explained in our VNC rescue guide.
For dedicated high-performance Linux cloud infrastructure with full root access and 1Gbps ports, explore Aminserve Linux VPS hosting and Windows RDP Servers with 24/7 dedicated support.